Airsoft Sniper Forum banner

Journal: Type 96 Do's, Don'ts, Mods & DIY SS trigger sears

2.4K views 14 replies 1 participant last post by  renfrey  
#1 ·
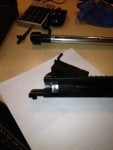
A while back, I picked up my first bolt action rifle, an ASG AW.308. Great bang for the buck! (for someone trying out the airsoft or bolt action side of life!)

As with any similar level rifle, they will eventually wear down and require some love...or a new level up rifle.

Well, I did both, but the funny thing was, I kept going back to my AW.308, and so began the adventure!

Along the way, I determined that I needed a 90 deg trigger sear (among many other things). So I came up with my own design, and figured that I would do a log of building my own stainless steel sears to convert my stock trigger assembly to a 90 deg trigger, that can hold great loads.

While documenting the process, I then realized that it was more of a journal of my whole adventure with my AW.308.

Please do note that I do not feel that everything here is absolute! We are always learning, and we all have learnt from our own mistakes. To continue forward, we have to. I am always trying new and different things, and testing theories, even if they conflict with my own!

**THIS IS A WORK IN PROGRESS**
**AS I COMPLETE DOCUMENTING SECTIONS, I WILL ADD THEM**

So without further adieu....
 
#2 ·
After using my ASG AW.308 (type 96) rifle for a while (stock), the itch got me, and I wanted more out of it. So, as with many of us, I started to apply the standard DIY mods. Still wanting more, I then went and picked up the standard "upgrade kit" that was available for my rifle, which is pretty common with most manufactures; a stronger spring, aluminum spring guide, and an aluminum piston. That's when things started to go downhill. The rifle was shooting very decently for a while (but not quite where I wanted it yet), and then I started to notice that it was getting more difficult to cycle the bolt back in. That led to a clicking sound as I pushed the bolt back in, which turned out to be the cylinder nozzle head slightly clipping the edge of the entry hole in the hop up chamber. So I had smoothed everything out in the hop up chamber, de-burred all the edges, and put a chamfer on the entry hole to help guide the cylinder nozzle in. That helped, but only a little. Things got worse, the difficulty to cycle the bolt back in, became extreme, and along with it was an un-nerving metal to metal grinding sound. At that point, I had enough. I put the rifle down, and tore the entire thing down, to study each and every part, and I was not very happy with my findings. Not all problems were found at the same time, but one thing led to another. I have some design/engineering in my past, so I went over things with a fine tooth comb!

*note* Even with my findings, I still firmly feel that for the price, this rifle is an excellent platform to build on or for anyone trying out the bolt action sniper life. I still recommend this rifle to friends who are curious to try out this area of the game.
 
#3 ·
To make a long story, short (or possibly longer), here is a breakdown of the problems I found:

(and I found that these problems are fairly common amongst most stock 96 style rifles, with similar upgrade paths, so I must point out that this is NOT restricted to the ASG AW.308)

-The cylinder had scratches along its length. I felt around the inside of the receiver and noticed that it was not smooth, there was some burrs. Then I discovered the real culprit: at the rear of the receiver, just behind where the bolt rests, I noticed an edge/lip. The edge/lip goes the entire inside circumference of the receiver. It appears as though the cast mold had a misalignment for the cylinder opening, causing the section behind where the bolt rests, to be slightly lower. It's hard to see, so to understand it better, just take any kind of same size tubes, put them together (edge to edge), and then move one slightly lower than the other.


Attachments

#4 ·
-When you pull the bolt/cylinder back, there is play. There shouldn't be. Period. The problem is that the cylinder is aligned at center, by a small nylon ring mounted inside the receiver, on the front end. That's it. No other alignment ring. So when you pull the bolt out, it's only being held center, at the front of the cylinder, allowing you to move the back around, and changing the angle of the cylinder. The back of the receiver does help a little, to keep it center when the bolt is pushed back in, but it is not perfect. As you cycle the bolt, this causes other problems, which I will mention later.

-The cylinder head had scratches on the nozzle, from just slight scraping, as it would enter/exit the hop up chamber.
-The cylinder head would make a seal, but has play as it is being threaded in.
-The cylinder (aluminum) was not round. Although very slight, it had more of an egg shape to it.
-The slot in the cylinder, was very rough along the long edges, from scraping on the edges of the trigger spring guide plate. (the square'ish rod that sticks out of the trigger box.
 

Attachments

#5 ·
-The "upgrade kit" piston fit very well in the stock cylinder, but was technically floating in the cylinder. The rubber washer was sized well, and made a pretty good seal, but because the groove that it sits in, is about the same depth as the thickness of the washer, this would allow the piston to contact the sides of the cylinder, when under pressure. The floating aspect also allows for the piston to be on an angle, at any point during its movement.

-The piston was worn and rough at the back end, where the trigger/piston sear catches (piston sear catch ring). This was with the aluminum piston from the "upgrade kit" for this rifle. It should also be noted that I had smoothed out and polished this a few times, to yield a smoother action. This was due to a few factors, first off, aluminum is soft, so it will mark up easily. Also, with the varying height that it would catch, because the piston can move, the pressure exerted on the piston, from the sear, can also change. Combine those with a 45 deg sear on a 90 deg piston, and you have some decent wear happening (yes, you read that correctly, I'll get to the sear issue below)

I appologize that I don't appear to have any pictures of the stock piston, and closer pictures of the "upgrade" kit piston. I'll have to dig them out and snap some better pics later.

The "upgrade" kit piston is the top piston in the picture.
 

Attachments

#6 ·
-The stock spring guide seat (the square tube coming out of the trigger box), has a slot cut in the top of it, kinda like a small tuning fork. This is so that the cocking indicator rod that some of our rifles have (small rod that goes through the center of the cylinder), can pass through the spring guide seat. One of the fork legs, was broken off, and it was visually obvious that it was grinding along the slot in the cylinder. That, combined with the soft aluminum cylinder and the cast design for the guide seat, it was inevitable to fail at some point.
-The stock spring guide seat also has a small raised portion near the top. This serves a couple of purposes, which I will explain further, later on, but for the problem side of things, that raised area is supposed to fit in the indentation in the back of your spring guide. When I hold it up to the stock (nylon) spring guide, it fits in the indentation fairly well. Not perfect, but it works. When I hold it up to the aluminum spring guide from the "upgrade kit" for this rifle, it does not fit. So the spring guide will not seat flat and at 90 deg., it actually allows it to rock on it. This will throw off the trigger sear catch point, and also promotes compression of the spring, on an angle, which in turn can allow the spring to bow as it is being compressed, which can then push piston on an angle and touching the sides of the cylinder.
 

Attachments

#7 ·
- and finally, the last of the bigger issues, and probably the worst….the stock trigger/piston sear is a 45 deg. Sear. The stock (nylon) piston has a 45 deg sear ring edge, which matches. The aluminum piston from the "upgrade kit" has a 90 deg sear ring edge. This can, and will, cause multiple areas of damage.
Take a look at the S-Trigger website linked in this posting, http://www.airsoftsniperforum.com/41-vsr-rifles/6449-custom-90-vsr-trigger.html , for a good explanation diagram of the problems with 45 deg sears. On top of the obvious problems with using a 45 deg sear with a 90 deg piston, the 45 deg sear, is the root of all evil (even with a matching 45 deg piston), IMHO! When the rifle is caulked, the piston sear ring rests on the trigger sear. You have massive force from the compressed spring, pushing the piston forward. With the 45 deg setup, that force is being held at a 45 deg angle to the forward dirction of force from the spring. This in turn, presents the rear of the piston with an upward angled direction of force, which also presents the spring with a force direction of 90 deg (up), which will cause the spring to bow upwards, upon release. The front of the piston will be directed downwards. To add to that, when the trigger is pulled, and the sear released, the spring begins to de-compress and move the piston forward. As the piston moves forward, it pushes the sear forward, until it pass over it. As this is happening, the upward angled re-direction of force is put into play, and to top it off, the 45 deg angles help to further guide the rear of the piston upward, as it "rides" over the 45 deg sear. The sear has little springs on either side, one snaps the sear back up as the piston passes over it, pushing it down towards the rear, while being caulked, and the other snaps the sear back up after firing (piston pushes the sear forward, until the sear rotates to a point lower than the piston. The spring pushing the sear back up, only shows little force, but it still provides a very minute resistance to the forward force of the piston, and any amount of force greater than no force, will have an effect on the opposing force, in this case allowing the piston to ride up, like a ramp.

Now, the piston is moving forward and pushing upward, at the same time. This not only slows the potential speed that the piston can move forward, but also presents an upward force to the inside top of the cylinder. With an aluminum, or even a thin walled cylinder, and many cycles, this will alter the shape of the cylinder (to an egg shape). As the piston reaches its final destination, and slams into the back side of the cylinder head, it does so at a slight angle, not flat (as it should). The force does not just disappear at that point, it must continue until it has dissipated. Since the piston head applies the force un-evenly, the force continues unevenly, which could cause a slight movement of the cylinder & nozzle. It should continue straight forward, down the barrel. If you were to do some high speed filming of the process, with no spacers on the barrel, you would see the barrel flex in a forward waveform.
 
#8 ·
Now, on to the serious mods….

Ultimately I knew what all that was pointing at….a new cylinder set, and 90deg trigger set, at the very least. I quickly discovered that if I were to purchase all the required parts (and upgrade them at the same time), that I would be in the hundreds of dollars! This presented a challenge….what can I do myself, to reduce the overall cost as much as possible, and yet yield hopefully superior results?

I studied all the parts involved, and determined that there was a few key components that were possible for me to build myself:
- Cylinder
- Piston Sear
- Spring Guide Seat

I measured everything up, put it on paper, and came up with a design for each. This was difficult at first, until I soon realized that it was metric and not imperial (had to start using mm). I wanted to use stainless steel for all, as its features satisfy all of my requirements: very very durable and hard, can handle higher pressures and friction, corrosion free (with standard maintenance), easily obtainable, relatively inexpensive, and not too difficult to work with.
 

Attachments

#10 ·
Sorry for the delay in posts! Work has been rather busy and chewing up most of my time lately.....geesh!:mad:

Anyway, I had a little more time to get some more of my notes down. So, continuing on.....

The cylinder dimensions appeared to match those of round tubes, which you could easily order from many metal suppliers, and most online suppliers are now allowing small orders (as I only required about 12"). To make things even better, after much searching, I discovered the perfect material…..boat railing tube. Boat railing tube can be obtained in any length, cut from a straight tube. It can come in the exact dimensions necessary, is stainless steel, cheap, and the best thing is that it comes fully polished to a mirror finish! There are two types though, solid round tube and welded round tube. Solid round tube speaks for itself, welded round tube starts its life as a flat plate, which is then heated and bent to form a round, and then it is welded along the seam. You cannot see any evidence of the seam on the outside (it looks solid), but on the inside you will find the welded seam, although very small. The better of the two is obviously solid round tube.

Finding the correct tap for the threading in the end of the tube was relatively easy, confirming the threading....not so. Interestingly, for a metric based country, finding metric machine tools is very very difficult. After a lot of measuring of threads, I finally was able to confirm that the threading for the cylinder head is M25x1. A REALLY BIG TAP!!!! There is no way I was going to purchase one brand new, but i did manage to easily find quite a few used on Ebay for around $25usd. If anyone is to look for the same, I highly advise to stick to the listings for ones that are U.S. or Brittish made ONLY. Most of the used ones come out of Detroit, salvaged from the auto industry.

In the end however, I ended up dropping the cylinder build. It turned out that all I could obtain near me, was welded tube. I could order solid round tube online, but the cost to ship it over the border was at least 5 times the price of the tube itself. Combine that with the size of the M25x1 tap (extremely difficult to do by hand), and it was just not worth it for what I was aiming for.

After much investigation of the various brands of products available, I ended up ordering an Action Army Teflon coated cylinder, and an Action Army piston.
 
#11 ·
The Cylinder:
I admit that I am not a huge fan of the idea of Teflon coated cylinders. The Teflon will provide a reduced friction surface for the piston, but it has it's down sides: The Teflon coating WILL wear down with time (and use), and also has the risk of scratching fairly easily. The other cavit is that Teflon coatings, while have reduced friction, do not produce perfectly flat surfaces. If you were to look at a Teflon coating through a microscope, the surface is actually very pitted. The problem with that is that when your piston is pushed forward (in the cylinder), the rubber seal at the end of the piston, prevents the air in the chamber from escaping, the little pits in the Teflon allow for the possibility of air escaping while being compressed (although, very minute and possibly negligible). A better surface would be perfectly polished stainless steel. All things considered though, with proper and consistent maintenance, the Teflon coating could last for a decent amount of time, and considering the price jump to get a cylinder made of polished stainless steel, I was willing to compromise and try the Teflon cylinder. I was very impressed of the overall build quality of the Action Army Teflon cylinder, it was perfect round, dead straight, and had a decent weight to it. The cylinder nozzle is perfectly machined, no burrs or sharp edges, and a nice large diameter opening which didn't compromise the strength. The only change that I made on it was to put a little chamfer on the inside edge of the nozzle opening, where the BB rests. This way it will "cup" the BB.

The pictures show the Action Army cylinder head (silver colour), next to the stock cylinder head (brass).
 

Attachments

#12 ·
The Piston:
The Action Army piston is made of stainless steel and aluminum, yielding a very strong yet light piston. The build quality is fantastic, there were a few very very small burrs, but for the most part I was very impressed! It has two nylon guide rings around it, to keep the pistons travel path nice and true, and when placed in the Action Army cylinder, it made for a perfect fit.

The Action Army piston is the red piston in the picture. The other piston is the "upgrade" piston.
 

Attachments

#13 ·
The Spring Guide Seat:
IMHO, this is the one part that I feel is too often overlooked, as it plays a very important role.
The primary function is to provide a solid point for the spring guide to sit against while the bolt is cycled and the spring is compressed. The secondary function is the small raised portion on the end, which *should* fit perfectly center in the indentation on the back side of the spring guide. This should lock the spring guide in place, not allowing it to slide around while under compression. Also, when correctly positioned, it should also keep the spring guide perfectly centered in the cylinder, from compression to decompression (firing). For that reason, I am not exactly sure why many rifles make this easily adjustable. The fork cut out in the top of some, is just to allow the indicator rod to pass through and contact the inside of the piston, to let you know if the bolt has been cycled and is ready to fire.

In the pictures:
The black spring guide seat with the broken (missing) fork, is quite obviously the stock spring guide seat. The shiny stainless steel one is my spring guide seat build.

For the picture with the spring guides, from RIGHT to LEFT you have the stock nylon guide, then the "upgrade" aluminum guide, and finally the Action Army guide.
 

Attachments

#14 ·
Looking at the underside of the receiver, and I could see the square hole that the guide seat passes through. It looked like it provided plenty of surface to keep the guide seat straight, while under pressure from the spring. The stock spring guide seat fit very well through this opening, but I wanted it a little tight, to allow more surface contact and less chance of movement between cycles. Using the measurements I took, a small 6" piece of ÂĽ" stainless steel square rod was perfect. Dirt cheap, and minutely larger than the opening in the receiver. The first thing I did was flatten the sides, eliminate the rounded edges, obtain the size of the receiver opening, and square up one end. To do this is simple (but long), since the rod itself is square already, I just needed to file all four sides, until the rounds were gone, and all sides were equal and the exact dimension I wanted. I placed a good quality file in my vice and proceeded by sliding the rod along the file, while applying equal pressure at all points, this way it maintains equal material removal with each pass. You should only file the rod in one direction, don't slide it back and forth. I also ended up with some nicely sliced up fingers from the razor sharp edges this creates. Even though I was wearing some thick rubber coated gloves, AND had my fingers taped up with electrical tape!

Once I had the piece filed down to size (fitted as I went), I then scribed the outline of the indentations on the top. Taking my dremel, fitted with a diamond wheel, I slowly ground/cut the rough outline scribe. Following that was a session of precision filling with a variety of needle files. It should be noted that when working with stainless steel, you will need to have some high quality files or diamond files. It took a while, but eventually I managed to get everything down to the correct dimensions and all the surfaces flat.

I did a quick test fit, and everything seemed to fit and seat perfectly. Once I could get it fully assembled, I could do some fine tunning, if needed.
 

Attachments